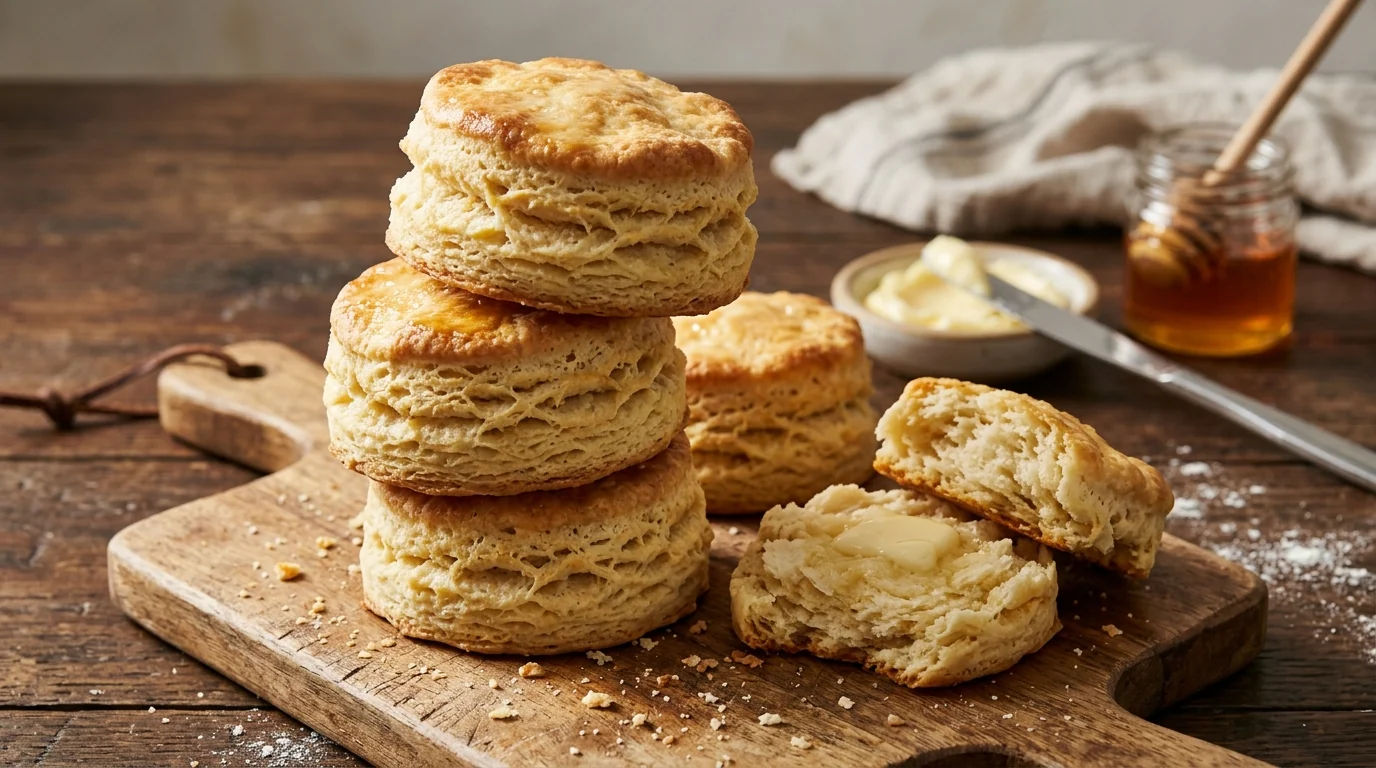
Flaky buttermilk biscuits are about temperature and touch. Cold butter creates layers, buttermilk brings tang, and folding the dough gently helps each biscuit rise without becoming tough.
Rather than relying on a long list of special ingredients, this approach pays attention to the details that matter: cold butter layers release steam in the oven, creating flaky structure. The recipe below gives a practical ingredient list, a clear cooking sequence, and the small adjustments that help it work in a real home kitchen.
The cooking idea behind Homemade Buttermilk Biscuits
Cold butter layers release steam in the oven, creating flaky structure. Good bread texture depends on how the dough is handled. Wheat flour supplies structure, while butter, milk or oil soften the crumb. Baking powder reacts promptly with wet ingredients, whereas yeast needs time to create a resilient network of air pockets. For homemade buttermilk biscuits, that principle guides the steps that follow.
Twisting the cutter can pinch edges and reduce rise. That is especially relevant here because the way you handle the ingredients before the final cooking stage affects both flavor and texture. Read through the method once before beginning so you can anticipate the moments that need attention.
Ingredients for Homemade Buttermilk Biscuits
For homemade buttermilk biscuits, these are the quantities for one home-kitchen batch. Measure everything before you start, especially 2 cups all-purpose flour. A different grain, flour, cut of meat or dairy product may change the result, so use the listed measurements on the first attempt.
- 2 cups all-purpose flour
- 1 tbsp baking powder
- 1/4 tsp baking soda
- 1 tsp salt
- 6 tbsp very cold unsalted butter
- 3/4 cup cold buttermilk
- 2 tbsp melted butter for brushing
Shopping thoughtfully for Homemade Buttermilk Biscuits
When shopping for homemade buttermilk biscuits with flaky golden layers, focus first on the ingredients that define the dish rather than replacing several things at once. 2 cups all-purpose flour is particularly worth checking for freshness and suitability, and 2 tbsp melted butter for brushing should be measured according to the recipe instead of added automatically. A short written list prevents having to change the plan midway through cooking. If you need to substitute, choose something with a comparable amount of moisture, fat or acidity, depending on the role of the ingredient. A thick dairy product behaves differently from milk, and dried herbs are not interchangeable measure-for-measure with a large bundle of fresh greens. The goal is to preserve the balance, not to match every ingredient by name. Twisting the cutter can pinch edges and reduce rise. When a different ingredient changes cooking time or texture, use the doneness signals given in the instructions and pause to evaluate before adding more liquid or heat.
Choosing and preparing the ingredients
2 cups all-purpose flour: Measure dry ingredients carefully. Flour and starch provide structure or thickening, so changes to their amount can noticeably alter how the finished dish sets. For homemade buttermilk biscuits, this ingredient joins 1 tbsp baking powder in the final balance.
1 tbsp baking powder: A reliable rise depends on active leavening and correct handling. Check freshness, and follow the indicated mixing and proofing process. For homemade buttermilk biscuits, this ingredient joins 1/4 tsp baking soda in the final balance.
1/4 tsp baking soda: A reliable rise depends on active leavening and correct handling. Check freshness, and follow the indicated mixing and proofing process. For homemade buttermilk biscuits, this ingredient joins 1 tsp salt in the final balance.
1 tsp salt: Seasoning should support the main ingredient rather than conceal it. Taste savory preparations before serving and add delicate spices with a light hand. For homemade buttermilk biscuits, this ingredient joins 6 tbsp very cold unsalted butter in the final balance.
6 tbsp very cold unsalted butter: Fat carries flavor and helps with browning. If using butter over sustained heat, watch for dark flecks and lower the flame before they turn bitter. For homemade buttermilk biscuits, this ingredient joins 3/4 cup cold buttermilk in the final balance.
3/4 cup cold buttermilk: Dairy contributes richness and a tender mouthfeel. Warm it gently in savory sauces and avoid prolonged hard boiling, which can spoil the texture. For homemade buttermilk biscuits, this ingredient joins 2 tbsp melted butter for brushing in the final balance.
2 tbsp melted butter for brushing: Fat carries flavor and helps with browning. If using butter over sustained heat, watch for dark flecks and lower the flame before they turn bitter. For homemade buttermilk biscuits, this ingredient joins 2 cups all-purpose flour in the final balance.
How to make Homemade Buttermilk Biscuits
Have the pan or pot ready and ingredients prepared in the order used for homemade buttermilk biscuits. The first instruction is to heat oven to 450°F and line a baking tray with parchment. Work through the stages without rushing; careful mixing, browning or resting will often matter more than saving a minute.
- 1
Heat oven to 450°F and line a baking tray with parchment.
Allow the oven time to reach its set temperature before the pan goes in; an oven that is still warming changes both the browning and the timing. Position the rack so there is room above the dish and check that your baking vessel suits the heat. In homemade buttermilk biscuits with flaky golden layers, the next move is to whisk dry ingredients and cut in cold butter; keeping the order steady helps.
- 2
Whisk dry ingredients and cut in cold butter, leaving pea-sized pieces.
Gather everything before combining it, particularly any ingredients that change texture when they sit. Work just until the mixture is even unless the instructions specifically call for kneading or extended beating; overworking delicate mixtures can make the result heavy. For homemade buttermilk biscuits with flaky golden layers, this stage sets up the next task: pour in buttermilk and stir only until shaggy dough forms.
- 3
Pour in buttermilk and stir only until shaggy dough forms.
Use the look and feel of the dough as your guide. Room temperature and flour absorption change the pace, so a soft, extensible dough is more useful than a rigid minute count. A lightly floured work surface is preferable to adding handfuls of extra flour. With homemade buttermilk biscuits with flaky golden layers, the sequence matters because you will soon need to turn onto lightly floured board.
- 4
Turn onto lightly floured board, press flat and fold into thirds three times.
Gather everything before combining it, particularly any ingredients that change texture when they sit. Work just until the mixture is even unless the instructions specifically call for kneading or extended beating; overworking delicate mixtures can make the result heavy. For homemade buttermilk biscuits with flaky golden layers, check this before moving on to pat to 3/4–1 inch thickness and cut with sharp straight-down cutter.
- 5
Pat to 3/4–1 inch thickness and cut with sharp straight-down cutter.
Move to the next stage only after checking how the ingredients look and feel. Keep the pan at a controlled heat, notice changes in aroma or texture, and adjust gently rather than trying to rush the process. Notice this change carefully in homemade buttermilk biscuits with flaky golden layers before you arrange close together and bake 12–15 minutes until deeply golden.
- 6
Arrange close together and bake 12–15 minutes until deeply golden.
Treat the suggested time as a checkpoint, not an automatic finish line. The important question is whether the center has reached the intended texture or safe temperature. If only the top is coloring, cover loosely and allow the interior more time. In homemade buttermilk biscuits with flaky golden layers, the next move is to brush hot biscuits with melted butter; keeping the order steady helps.
- 7
Brush hot biscuits with melted butter.
Finish in a way that emphasizes contrast: a fresh herb against a rich sauce, a little crisp topping over something soft, or a modest spoonful of glaze rather than a heavy coating. Serve when the texture is at its best. A final reminder for homemade buttermilk biscuits with flaky golden layers: twisting the cutter can pinch edges and reduce rise.
What to look for as it cooks
Bread continues setting as it cools. Very early slicing can compress the crumb, but a light brush of butter on warm rolls or biscuits makes the crust tender and inviting. This matters particularly for homemade buttermilk biscuits, where twisting the cutter can pinch edges and reduce rise.
Cold butter layers release steam in the oven, creating flaky structure. When deciding whether to move on, use smell, texture and appearance in combination with a thermometer for cooked meats. Note how the surface changes as moisture evaporates: a little concentrated flavor is welcome, but darkening too rapidly is a cue to lower the heat or shield the pan.
An organized cooking-day plan for Homemade Buttermilk Biscuits
Before beginning homemade buttermilk biscuits with flaky golden layers, read all of the instructions and group ingredients according to their use. Start with 2 cups all-purpose flour and make sure the cooking vessel, cutting board and measuring tools are within reach. The first active stage is to heat oven to 450°F and line a baking tray with parchment. This step is easiest to manage when the surrounding work area is clear and everything that must go into a hot pan has already been prepared. Arrange ingredients in small bowls only if that makes the method simpler; extra dishes are not a requirement for good cooking. Keep raw meat, where used, separate from ready-to-eat garnishes and wash hands and utensils after handling it.
As cooking progresses, the middle of this particular method asks you to turn onto lightly floured board, press flat and fold into thirds three times. This is a useful point to check whether the earlier stages have developed the intended appearance and whether the heat is still appropriate. Use the time between stages to prepare the serving dish, clean the board or arrange a simple side. At the finish, the instruction is to brush hot biscuits with melted butter. A small amount of attention here can preserve the contrast between creamy and crisp, moist and browned, or sweet and savory that makes the dish enjoyable.
If you are cooking for company, work backward from the time everyone will sit down. Finish preparations that can wait before starting the stages requiring close observation. Do not plan a precise serving minute around an unfamiliar oven: allow a reasonable buffer for resting, thickening or additional baking. For homemade buttermilk biscuits with flaky golden layers, the finished texture matters more than arriving at the table at an exact minute, and a briefly delayed meal is preferable to serving something underdone.
Common mistakes to avoid with Homemade Buttermilk Biscuits
Extra flour is tempting when dough feels sticky, but it can make the finished bread dry. Follow texture cues, keep butter cold where flaky layers are the goal, and give yeast dough sufficient time to rise. With homemade buttermilk biscuits, cold butter layers release steam in the oven, creating flaky structure.
For homemade buttermilk biscuits, a useful final check is to brush hot biscuits with melted butter. That is the moment to notice whether the ingredients need slightly different seasoning, moisture or rest time, rather than making several changes at once. Adjust in small increments and recheck the result.
Adaptations that keep the flavor in balance
Use a little honey in the butter brushed over baked biscuits. This is a useful direction if you want to adjust the meal for what is already in the pantry, while keeping the main character of homemade buttermilk biscuits with flaky golden layers. Keep the flour and liquid proportions steady unless you understand how the substitute changes the dough.
For homemade buttermilk biscuits, changes should serve the main flavors rather than mask them. Keep 2 cups all-purpose flour at the center of the plan; adjust strong seasonings cautiously and serve toppings separately when family preferences differ. That preserves the dish while giving everyone some flexibility.
What to serve alongside Homemade Buttermilk Biscuits
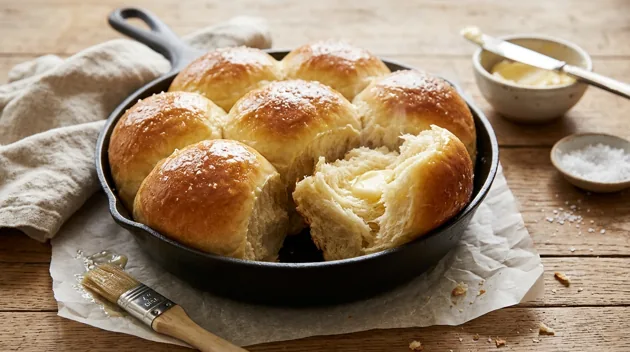
Pass the bread warm with soup, roast meat or a vegetable-rich supper; place a little butter or olive oil nearby if appropriate. If you are making a wider family spread, consider soft dinner rolls with butter and a tender crumb as another recipe in the same collection. The two dishes can inspire a menu even if you choose to prepare them on different occasions.
To serve homemade buttermilk biscuits without stress, choose a platter or bowl that fits the final texture. Gather utensils before the final step, follow the finishing instruction to brush hot biscuits with melted butter, and bring accompaniments to the table at the appropriate temperature. It is an easy way to make serving smoother.
Make-ahead planning, leftovers and reheating
For homemade buttermilk biscuits, most baked breads keep covered at room temperature for a day or two, depending on filling and dairy content. Freeze tightly wrapped portions for longer keeping; thaw then warm briefly.
Twisting the cutter can pinch edges and reduce rise. Planning ahead for this recipe works best when you separate tasks that hold well from finishing steps that need immediate attention. Wash and chop sturdy vegetables, measure dry ingredients, or prepare components of sauces early; save crisp toppings, fresh herbs and final glazing until near serving time. Label stored portions with the preparation date.
Questions about making Homemade Buttermilk Biscuits
How do I know when homemade buttermilk biscuits is ready?
For homemade buttermilk biscuits, the most dependable clue is the finished texture: Bread continues setting as it cools. Very early slicing can compress the crumb, but a light brush of butter on warm rolls or biscuits makes the crust tender and inviting. Twisting the cutter can pinch edges and reduce rise. Use a food thermometer for meat and the visual signals described in the method for baked dishes.
Can I prepare part of the recipe the day before?
Yes, many prep tasks can be done ahead. Twisting the cutter can pinch edges and reduce rise. Hold perishable ingredients refrigerated, follow the sequence when cooking, and add fresh or crispy toppings close to serving.
What can I change without losing the character of the dish?
Use a little honey in the butter brushed over baked biscuits. For homemade buttermilk biscuits, make one adjustment at a time and keep the balance of 2 cups all-purpose flour and 1 tbsp baking powder in mind.
What should I do if the finished texture seems wrong?
For homemade buttermilk biscuits, Extra flour is tempting when dough feels sticky, but it can make the finished bread dry. Follow texture cues, keep butter cold where flaky layers are the goal, and give yeast dough sufficient time to rise. Cold butter layers release steam in the oven, creating flaky structure. Check heat and moisture before making several changes at once.
How should I serve and store leftovers?
For homemade buttermilk biscuits, Pass the bread warm with soup, roast meat or a vegetable-rich supper; place a little butter or olive oil nearby if appropriate. Most baked breads keep covered at room temperature for a day or two, depending on filling and dairy content. Freeze tightly wrapped portions for longer keeping; thaw then warm briefly.
Looking for something to go alongside this dish? Find more ideas in Homemade Breads.